Roof Antenna Upgrade
- Model & Year: 97-00 5-Series
- Expertise: Beginner
- Date: December 15, 2021
- Updated:
- Time Estimate: 1 hour
Tools Required
- Work Light
- Basic Hand Tools
Facilities Needed
- None
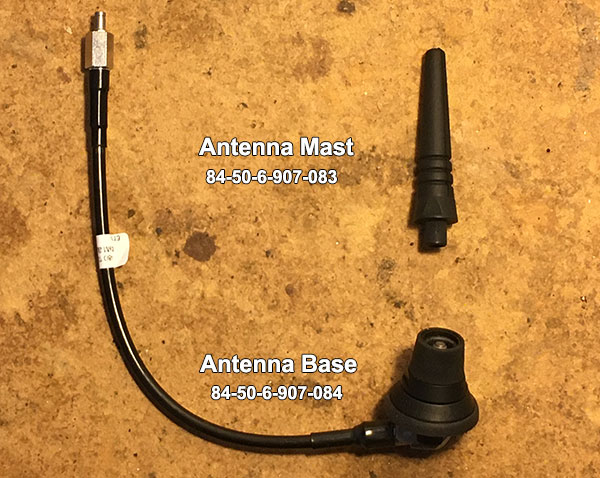
Parts Required
- Antenna Base, p/n 84-50-6-907-084, $109.10 (list price)
- Antenna Mast, p/n 84-50-6-907-083, $30.24 (list price)
Getting Started
Replacing your old roof-mounted, single-band phone antenna (thru 7/2000) with the more modern dual-band antenna will give not only a better look but also help prevent possible water leaks.
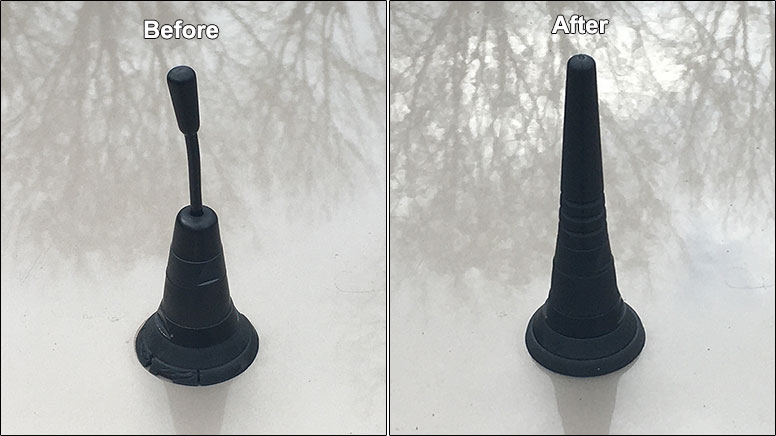
Look carefully at the "before" image above. Notice the antenna's split and failing rubber base seal. Old seals have been known to allow water to enter the roof, and then run down the rear pillar into the battery compartment. You don't want that. The rubber seal is not sold seperately and comes only with a new base.
Incidentally, the dual-band double mast antennas installed on late-build E38 sedans did not require a roof opening and were instead affixed to the roof using double-sided tape. The attached antenna cable was tucked inside the rear window seal and entered the trunk thru a grommet mounted on the side of the trunk opening. This eliminated the potenial for water leaks.
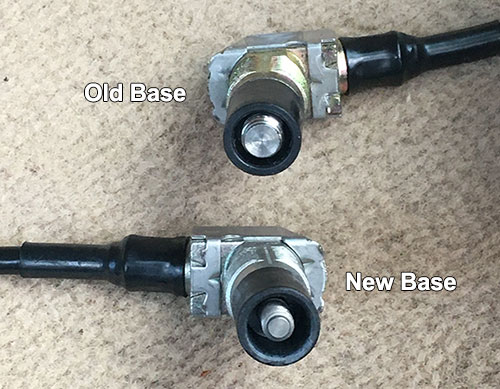
A new antenna base is required not only to renew the seal but also because the new antenna mast has a different (smaller) thread size. See image below:
Additionally, the new antenna can be made functional by installing a universal "eject box". See: Phone Charging & Signal Boosting. New antenna installation is quite simple and requires only about an hour.
Procedure
This procedure is applicable to both E39 and E46 built thru 7/2000 but written specifically for E39 touring wagons.
1) Using wrench included with new antenna, unscrew old antenna from base. Then, unscrew and remove base collar using finger pressure (if inadequate, use a common wrench).
2) Pry out and unplug rear dome light to gain access to the antenna base from underneath.
3) Reach up inside and release metal clip securing base cable inside roof cavity, then extract the base:
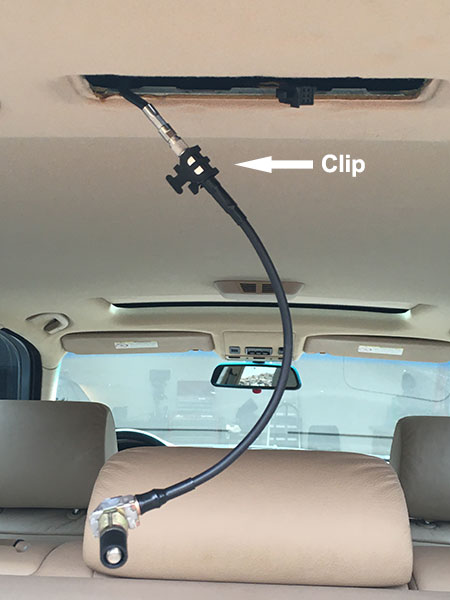
4) Seperate base cable by hand (it's a press fit) and remove old base. Plug-in new base and re-attach metal clip.
5) Insert new base into roof cavity and secure with clip.
6) Position base to receive collar and antenna from outside. A helper to hold the new base in position from underneath is beneficial. Screw on new collar finger tight only (do not crush new rubber seal). Then attach new antenna mast and tighten using provided wrench.
7) Replace dome light. Done!