Steptronic Shift Pattern Reversal
- Model & Year: 96-97 8-Series
- Expertise: Beginner
- Date: July 25, 2008
- Updated: February 2015
- Time Estimate: 2 hours
Tools Required
- Basic hand tools
Facilities Needed
- None
Parts Required
- None
Getting Started
I love my steptronic transmission! It's the best of both worlds: the sportiness of a manual and the everyday convenience of an automatic. My only gripe was the counter-intuitive manual shift directions (forward to upshift, back to downshift). I prefer to upshift with acceleration forces (back) and downshift with deceleration forces (forward).
Beginning in 2002, BMW relented to criticism and reversed the shift directions in all steptronic cars. Fortunately for those of us with pre-'02 models, we can have the same with a simple cut-n-splice wiring procedure!
This reversible procedure was first noted at www.bmwtips.com in January of 2002 for 5-series owners. Even though the procedure below is written specifically for the 8-series, both write-ups generally apply to all pre-'02 BMW's. A minor remaining issue is the shift symbol displayed on the console cover (+/-). You may be able to adapt a cover from another '02-on BMW but, for me, it's a non-issue since few people notice these symbols anyway.
Procedure
1) Remove the main console trim:
a) Remove gear shift handle by pulling up (hard).
b) Remove shift surround boot using a small screwdriver for prying it up and off.
c) Release retaining screws for shift cover (2).
d) Remove all center console switches by pushing up and out. Unplug and set aside.
e) Remove radio.
f) Remove the OBC by pushing out from behind.
g) Release console retaining screws behind and above open OBC area.
h) Pull console trim back and up. Unplug climate control module and phone mic grille.
2) Locate yellow steptronic shift connector on lower right side of shifter. Unplug. See image below:
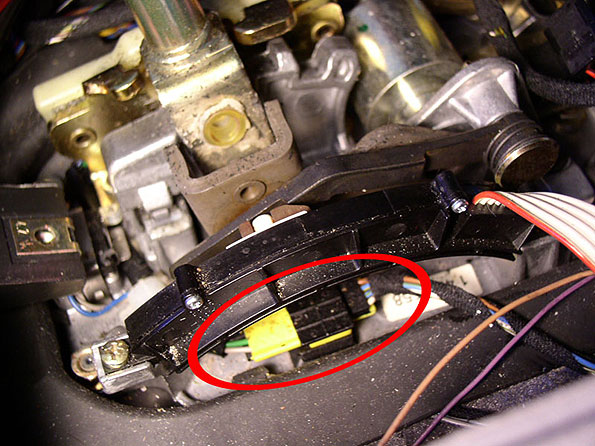
3) The source connector has four wires:
- pin 4 - white/green (manual mode)
- pin 3 - blue/beige (upshift)
- pin 2 - blue/green (downshift)
- pin 1 - brown/black (ground)
The blue/beige wire (pin 3) and blue/green wire (pin 2) need to be reversed.
4) Pry open the yellow connector and reverse pin two (2) and pin three (3). Replace. Done.
5) Console re-installation is reverse of removal. Enjoy!