Interior Air Filter Replacement
- Model & Year: 95-01 7-Series, U.S.
- Expertise: Beginner
- Date: December 2015
- Updated:
- Time Estimate: 1 hour
Tools Required
- Basic hand tools
Facilities Needed
- None
Parts Required
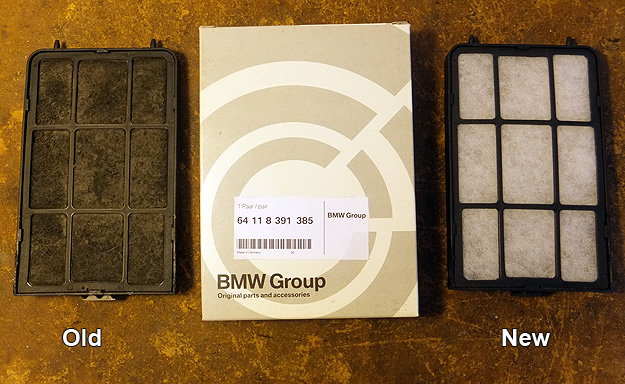
- (1) Interior Air Filter Set: p/n 64 11 8 391 385, list: $27.90
Getting Started
Did you know that, in addition to the outside cabin air filters (located under the hood) there are also a pair of internal air filters, used to filter recirculated air inside the cabin? They are usually in very bad condition because not only are they forgetten, they are also very difficult to replace due to their confined location -- on each side of the central airbox. See diagram below:
However, there's a simple technique that makes filter replacement easier.
The grille that retains the filter element is easily removable. This means reaching into very tight spaces to replace the whole filter cartridge is not necessary. Instead, pull off the grille, replace the filter element, and re-install the grille. In fact, you may wish to cut a replacement filter element from your own material using the original as a template. No new parts would then be required.
The passenger-side filter is the most accessible and fairly easy to replace. The driver-side is another story. Here, you'll have to remove the underside panel and contort your left hand while holding stuff with your right.
If purchasing new, note filters come in pairs, inside a single box. (No need to buy two boxes!)
Procedure
Start with the relatively easy-to-reach passenger side, and then move to the driver side.
1) On a work bench, separate the grilles off each new filter cartridge and remove the filter element. See image below:
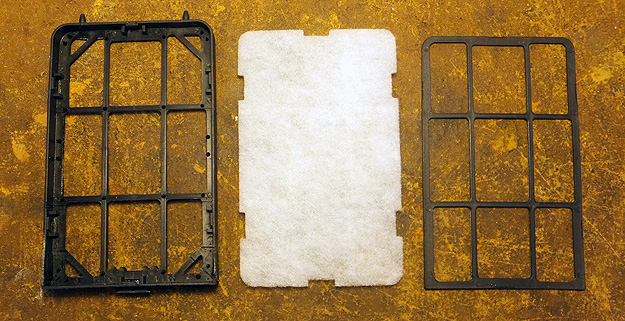
Note how the grilles are held in place by tabs around the inside edge of the cartridge. Notice further that the rounded corners of the grille are on top. You'll need to know this later.
2) Lower and fully extend your glovebox. (Yes, your glovebox extends rearward for easy access to its contents from the driver seat. If it does not stay extended once released, you need new glovebox struts. See Glovebox Rebuild.)
3) Lying on your back in the passenger footwell, locate the existing filter cartridge. Reach up and pull the grille off the existing cartridge and pull out the filter element. The old filter will probably be black in color if it hasn't been replaced recently.
Place thick blankets or towels on the door sill to cushion your back.
4) Insert the new filter element in place of the old and snap the grille back onto the cartridge. The round corners of the grille face upwards. Be sure the grille is securely held by the retaining tabs on the cartridge.
One down. Now the hard part...
5) Remove the four (4) screws from the driver's underside panel and two (2) quarter-turn fasteners at the rear. Extract panel.
The driver's heat duct will be loose and obstruct your view of the filter cartridge. You may be tempted to remove the duct. Keep in mind the duct will rarely come loose without breaking or tearing. If you insist on removing it, it's better to remove the front lower trim panel first, in order to gain access to the barbed clips that hold the duct in place.
However, filter replacement can be done with the duct in place.
6) As in step 3, lie on your back in the driver footwell with a work light, and locate the existing filter cartridge by pulling down on the heat duct. This will also serve to move the front lower trim panel out of your way too.
7) Reach up with your left hand while holding the heat duct down with your right hand, and pull the grille off the existing filter cartridge. Then pull out the filter element.
8) Slide the new filter element in place. You will only be able to see the botttom third of the cartridge, so work by feel to verify the new element lays flat inside the cartridge.
9) Slide the grille up into the cartridge frame, making sure the grille fits under the retaining tabs on the inside of the cartridge and its round corners face upward. This will be quite difficult due to limited visibility and clearances.
If not every retaining tab is secure, don't worry. Just make sure the top of the grille is under its tabs (by feel), and the bottom center tab is secure. That should be sufficient to hold it.
Reinstall lower panel. Done!
Now, stretch your aching back and vow that next time, you'll let the neighbor kid get up in there.