Fuel Sender/Gasket Replacement
- Model & Year: 92-98 3-Series
- Expertise: Beginner
- Date: October 2, 2003
- Updated:
- Time Estimate: 2 hours
Tools Required
- Basic hand tools
- Flashlight
Facilities Needed
- Garage or level surface
Parts Required
- Fuel Level Sender or Fuel Pump Unit (if needed; see dealer for appropriate p/n), $52+ retail
- Collar Ring Gasket, p/n 16 11 1 179 637, $7.35 retail
Getting Started
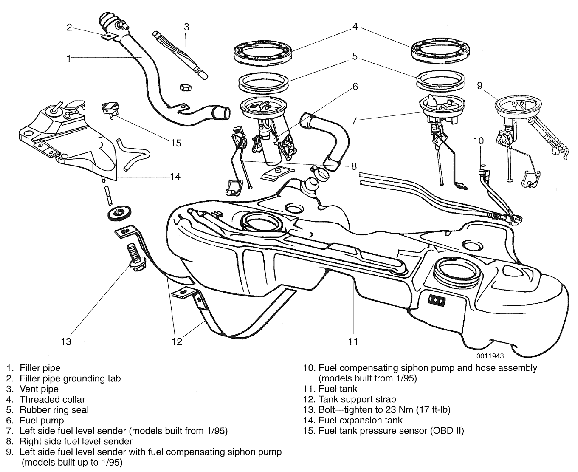
Do you smell fuel after filling up the tank? If so, you probably have either a leaking collar ring gasket or a cracked fuel level sender/fuel pump unit. These parts are located under the back seat, on top of the fuel tank. Item 6 below is the fuel pump, item 7/9 are the fuel level senders (check model year), and item 5 is the ring gasket.
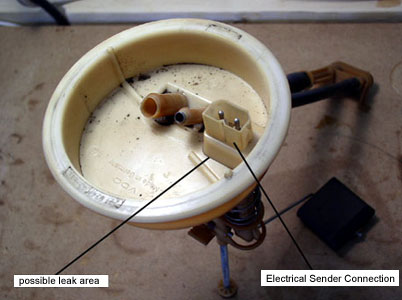
The top of the fuel level sender/fuel pump may develop hairline cracks around the base of the electrical connector housings (see image below). If, when you open the access covers and see fuel pooling in the middle of the sender unit, you probably have a cracked sender unit. On the other hand, if you see traces of fuel running down the front of the fuel tank or a wet ring gasket, you probably have a bad ring gasket.
NOTE: You will need a full tank of gas before beginning, to source the leak. The procedure for replacing the sender unit or the ring gasket is the same. Always replace the ring gasket when replacing the sender units.
Procedure
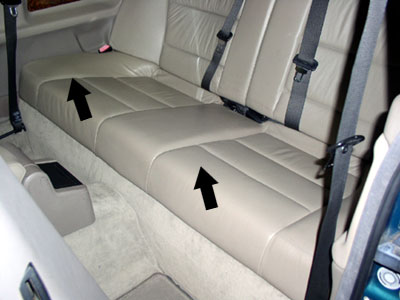
1) Lift up on front of rear seat and remove. See image below.
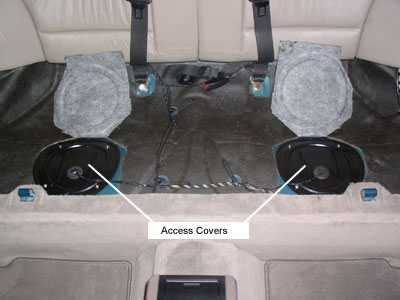
2) Lift up insulation to reveal access covers. Using phillips screwdriver, remove both access covers then unplug electrical connector(s). See image below.
3) Check for fuel pooling in center of sender units or fuel leaking around gaskets and running down tank. The former indicates cracked sender units, the later a bad gasket.
4) Disconnect fuel hoses. Keep a rag handy to soak up spills.
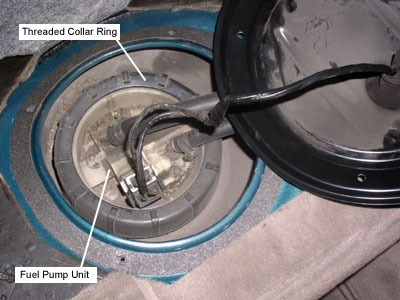
5) Using a hammer and long blade screwdriver (or other tool), gently tap threaded collar ring counter-clockwise to loosen and remove. See image below.
6) Carefully extract old fuel sender/fuel pump with ring gasket. Be careful not to drop any debris in open tank! Use a rag to soak up spills.
7) Install new ring gasket inside threads on tank.
8) Insert new sender/pump, making sure of seal with new gasket.
9) Re-install threaded collar finger-tight, then tap secure with hammer. Do not over-tighten. Collar ring should become "snug" only.
10) Reconnect fuel hoses and electrical connector(s). Check for leaks by taking a quick drive (with a full tank).
11) Once satisfied, install covers and replace seat. You're done!